In today’s digital age, email communication remains an integral part of our personal and professional lives. One way to make your emails stand out and leave a lasting impression is by creating a professional signature. Outlook, a popular email service, provides users with the tools to design a signature that not only includes your name and contact information but can also incorporate elements like job titles, logos, and links. In this guide, we’ll take you through the step-by-step process of how to create a signature block in Outlook that adds a touch of professionalism to your emails.
Create a Signature Block in Outlook in 2 Min
Step 1: Log Into Your Hotmail Account
The journey to creating a standout Hotmail signature begins by opening your preferred web browser and navigating to the Hotmail website or the Outlook app. Log in to your Outlook account using your credentials to gain access to your email settings.
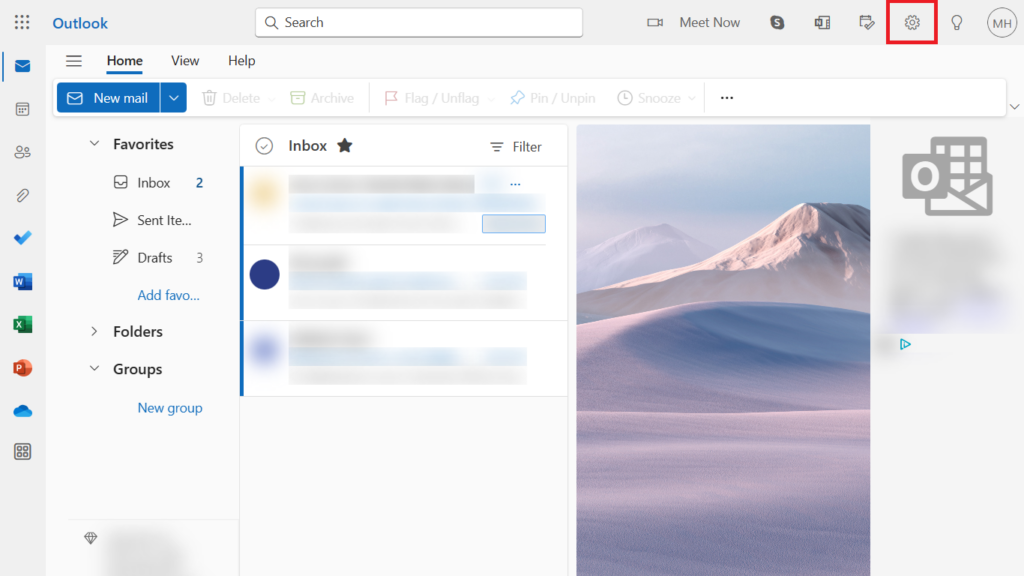
Step 2: Access Hotmail Settings
At the top-right corner of the Hotmail interface, you’ll spot a gear icon, which signifies the Settings menu. Click on this icon to open the settings menu, where you can customize various aspects of your Hotmail account.
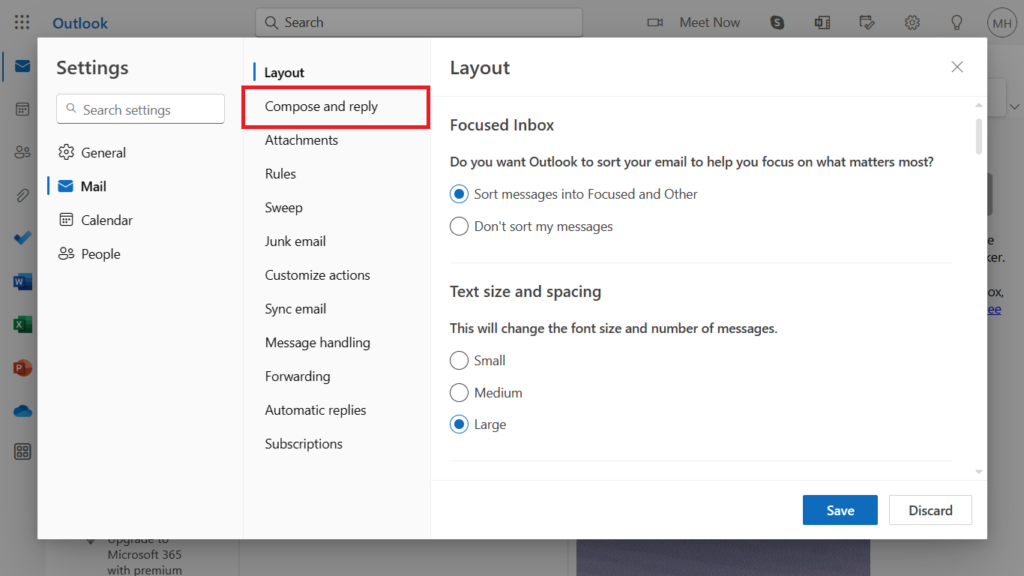
Step 3: Navigate to the “Compose and Reply” Tab
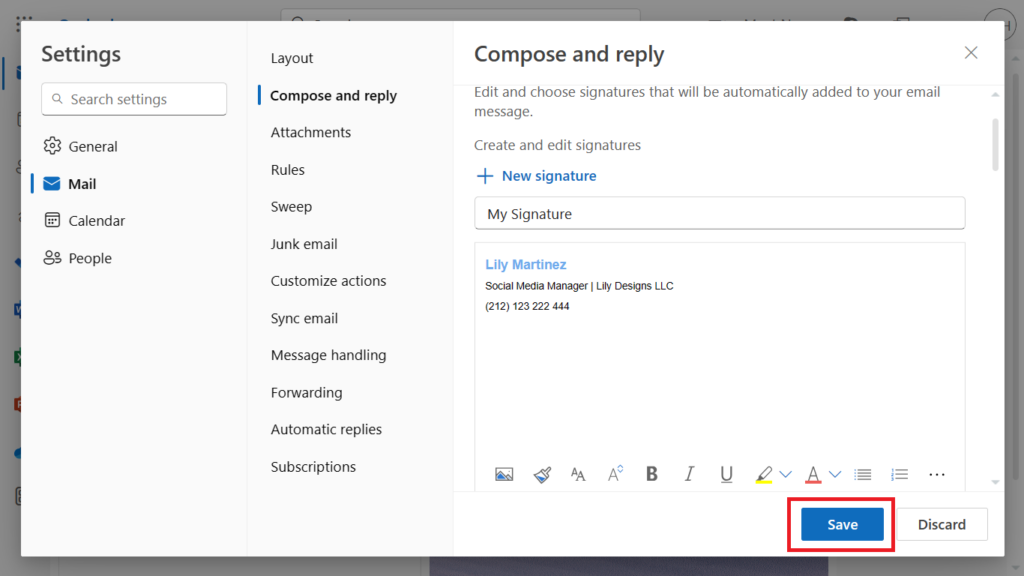
Within the settings menu, direct your attention to the left sidebar. Look for the “Mail” section, and once found, select “Compose and reply.” This section holds the key to configuring your email signature among other email composition settings.
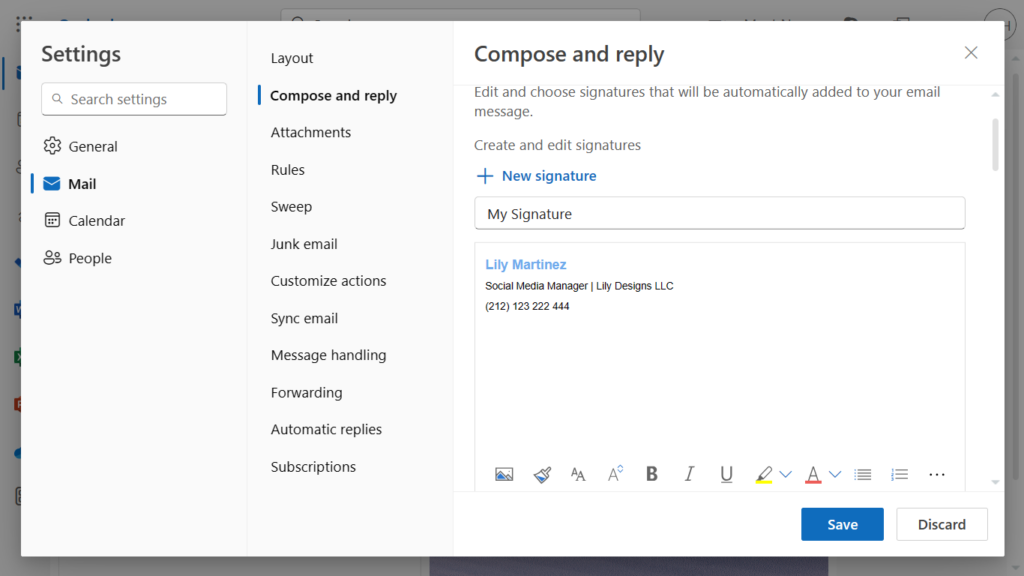
Step 4: Create Your Signature
Scroll down the settings page until you reach the “Email signature” section. This is where the magic happens. Take your time to create and format your signature exactly how you envision it. Include vital information such as your full name, job title, contact details, and any other pertinent information. Moreover, you have the option to add a personal touch by incorporating images or links.
You can also create a professional email signature like the one below through our free email signature generator to include in your Outlook profile.

You will just need to edit the information, choose from a variety of templates, copy the HTML code and paste it into your Outlook.
Step 5: Save Your Changes
With your signature perfected, scroll to the bottom of the page. Here, you’ll find the “Save” button. Clicking this button ensures that your carefully crafted Hotmail signature settings are securely stored.
With these steps completed, your newly designed Hotmail signature will be automatically appended to every email you compose. If the need arises to modify or remove your signature in the future, simply revisit the settings page to make the necessary adjustments. A well-crafted signature not only adds a professional touch to your emails but also ensures that your recipients remember you for all the right reasons.

