Signatures serve as a virtual business card, providing recipients with essential contact information, such as name, title, company, and contact details. They also offer a platform for branding, enabling organizations to reinforce their visual identity through logos and promotional taglines. With the prevalence of digital correspondence, signatures add a personal touch, fostering a sense of trust and credibility among recipients. In this blog, we will guide you step by step on how to create signatures in Outlook.
How to make signature in Outlook mail
By understanding the process of Creating Signatures in Outlook, individuals and organizations can harness the full potential of this feature to leave a mark of distinction in their digital interactions.
Step 1: Log Into Your Outlook Account
Begin by opening your preferred web browser and navigating to the Outlook website. Once you arrive at the Outlook homepage, log in to your account using your credentials.
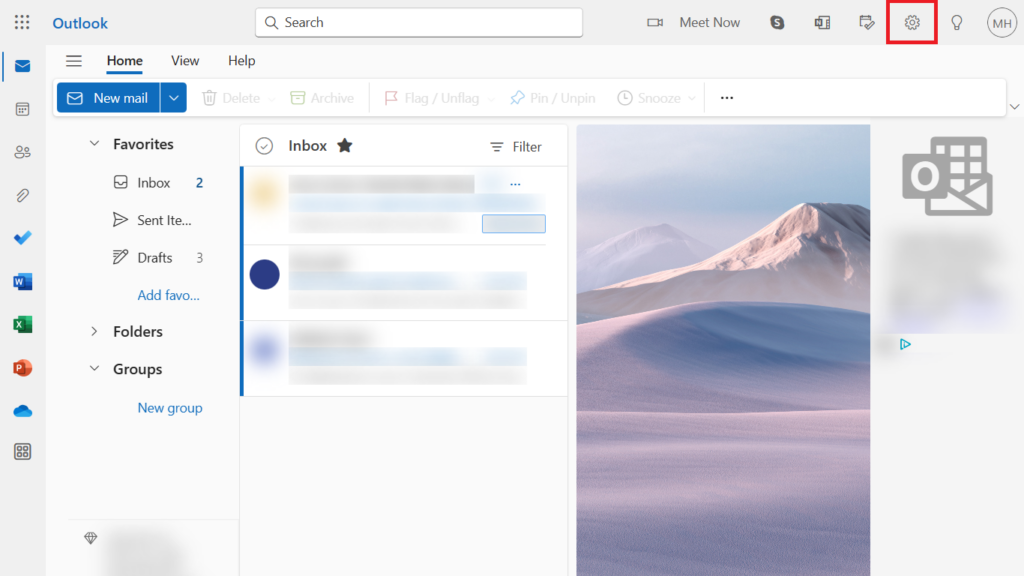
Step 2: Access Outlook Settings
At the top-right corner of the Outlook interface, you’ll notice a gear icon, which symbolizes the Settings menu. Click on this gear icon to access the settings menu, where you can customize various aspects of your Outlook account.
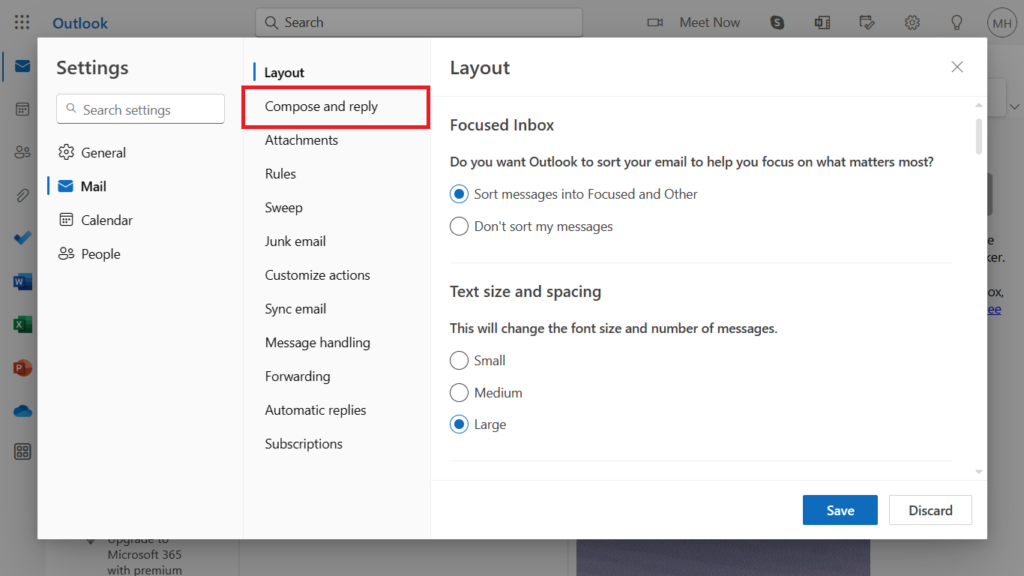
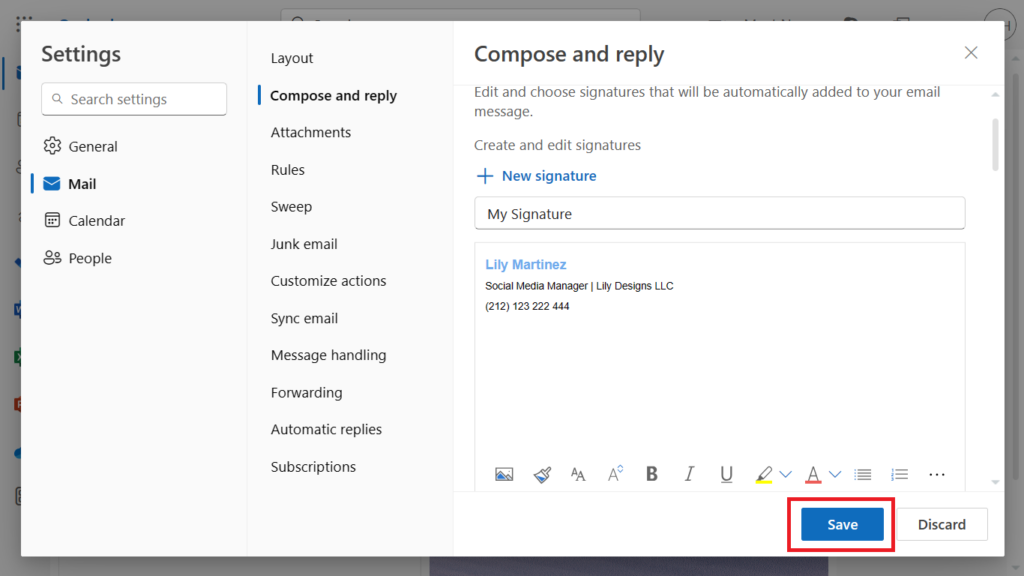
Step 3: Select “Compose and reply”
In the left sidebar of the extensive settings menu, find the “Mail” section. Once you’ve located it, click on “Compose and reply.” This is the section where you can configure your email signature, among other settings related to email composition.
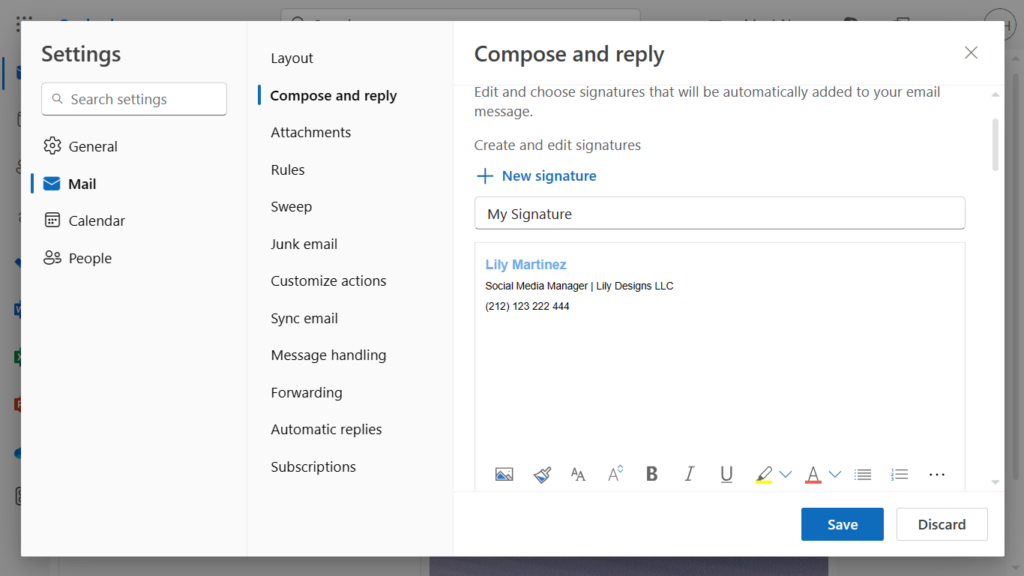
Step 4: Create Your Signature
Scroll down to the Email signature section. Here, you can create and format your signature with your name, job title, contact information, and any other relevant details. Moreover, you have the option to add a personal touch by incorporating images or links. Take your time to create and format your signature exactly as you envision it.
Step 5: Save Changes
Once you’ve carefully composed your signature, scroll down to the bottom of the page. Here, you’ll find the “Save” button. Clicking this button ensures that your Outlook signature settings are securely stored.
With these steps completed, your newly designed Outlook signature will be automatically appended to every email you compose. If you ever wish to modify or remove your signature, simply return to the settings page and make the necessary adjustments.
A professionally crafted Outlook signature not only enhances your email’s appearance. So, go ahead and design your signature to make your emails stand out in the crowd with this easy how to make signature in Outlook mail guide.