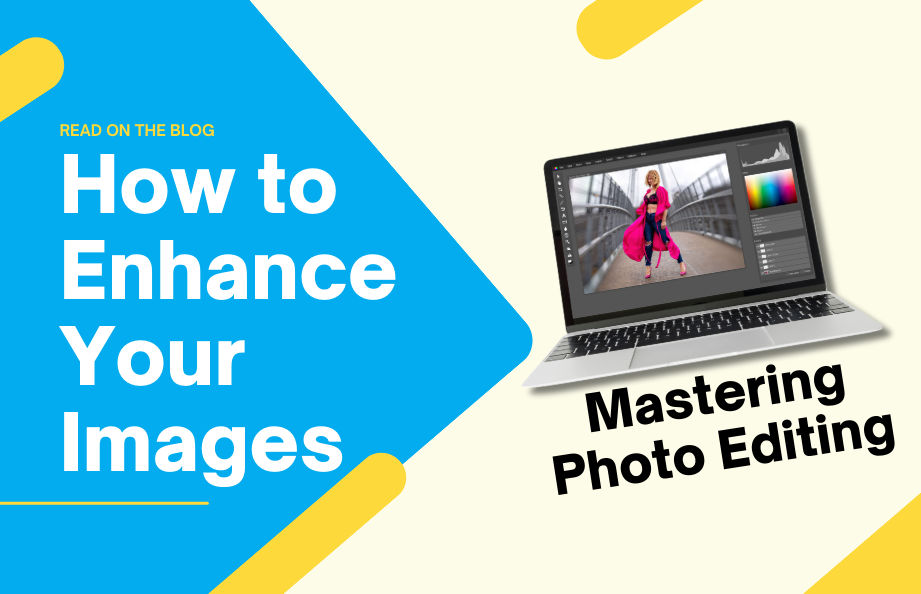
In this era of digital technology, photography has seamlessly integrated into our daily lives. We capture countless moments with our smartphones and cameras, but often, the raw photos may not match the vibrant scenes we remember. That’s where photo editing comes in. Learning how to enhance your images through photo editing can turn an ordinary picture into a stunning work of art. In this blog, we’ll explore the world of photo editing how to tips, providing you with essential tips and techniques to master this art.
The Basics of Photo Editing: How to Edit Images
Photo Editing Software
To master the art of photo editing, it’s essential to choose the right software. The software you select will significantly impact your editing capabilities and workflow. There are various options available, each with its unique features and complexities. Here are some popular choices:
Adobe Photoshop: As the industry standard, Photoshop offers a comprehensive suite of tools suitable for beginners and professionals alike. It can handle everything from simple touch-ups to intricate manipulations.
Adobe Lightroom: Lightroom is perfect for photographers who want to streamline their workflow and focus on enhancing the overall look of their photos. Its powerful organizational tools and non-destructive editing capabilities are notable.
GIMP (GNU Image Manipulation Program): If you’re on a budget, GIMP is a free and open-source alternative to Photoshop. It might have a steeper learning curve, but it’s a robust option.
Canva: For an easy-to-use, web-based solution, Canva is an excellent choice. It offers user-friendly features and a range of templates for various design projects.
Photo Editing Apps for Mobile Phones: If you prefer to edit photos directly on your phone without using software on a computer, you’re in luck! There are plenty of powerful mobile apps available that can help you enhance and transform your photos with ease. From basic adjustments like cropping and color correction to advanced filters and effects, these apps offer a wide range of editing tools right at your fingertips.
Now that you’ve selected your software, let’s move on to the next step.
Best Tips for Professional Photo Editing
Here are the steps that will help in editing pictures.
1. Enhancing Exposure and Color
Now that you have your photos loaded into your chosen photo editing software, it’s time to delve into the fundamentals of enhancing exposure and color. These are critical aspects of photo editing that can significantly impact the overall look and feel of your images.

Adjusting Brightness and Contrast
One of the foundational steps in photo editing is tweaking the brightness and contrast levels. Properly balancing these two elements can vastly improve the visual appeal of your photos.
- Brightness: If your image appears too dark or lacks the desired level of illumination, you can increase the brightness. Conversely, if it’s too bright and lacks detail, decreasing the brightness can help.
- Contrast: Contrast defines the difference between the brightest and darkest parts of an image. Increasing contrast can make your photo appear more dynamic while reducing it can create a softer, more even-toned look.
Start with Small Adjustments
It’s easy to overdo it with brightness and contrast. Make small adjustments and evaluate the results before going further.
Playing with Color
Color is a powerful tool in photo editing, allowing you to evoke emotions, set moods, and create stunning visual effects. Here are some key color-related adjustments you can make:
- Saturation: Saturation controls the intensity of colors in your image. Increasing saturation makes colors more vivid while decreasing it can create a muted, pastel-like effect.
- Vibrance: Vibrance is similar to saturation but is more intelligent. It boosts the intensity of less-saturated colors without oversaturating already vibrant ones, resulting in a more balanced look.
- Hue Adjustments: With hue adjustments, you can change the overall color tone of your image. For example, you can shift the hues to make greens appear more teal or blues more turquoise.
Mastering exposure and color adjustments is a vital step in how to do photo editing journey. These adjustments help you correct lighting issues and bring out the full potential of your images. As you progress in your editing journey, you’ll learn how to fine-tune these settings to achieve the desired visual impact.
2. Perfecting Composition
In the world of photography and photo editing, composition plays a pivotal role in creating visually appealing and impactful images. The way you frame and arrange elements within your photograph can make a significant difference in the final result. Let’s delve into some essential composition techniques to elevate your photo editing skills.

Crop and Straighten
Cropping and straightening are fundamental techniques in photo editing that can drastically improve the composition of your images.
- Cropping: Cropping involves trimming or removing parts of the image that are distracting or unnecessary. It allows you to focus on the key elements and create a stronger composition. Most photo editing software provides cropping tools that allow you to adjust the aspect ratio and crop freely.
- Straightening: If your image has a crooked horizon or tilted elements, straightening is a must. Crooked lines and horizons can detract from the overall quality of your photo. Use the straighten tool to align these elements properly.
Rule of Thirds
The rule of thirds is a time-tested composition guideline that can significantly improve the balance and visual interest of your photos.
- Divide your image into a grid: Mentally divide your image into nine equal parts by drawing two equally spaced horizontal lines and two equally spaced vertical lines. This creates a grid with four intersecting points.
- Place subjects on the intersections: The rule of thirds suggests that placing your main subject or points of interest on or near these intersection points creates a visually pleasing and balanced composition. It helps avoid the common pitfall of placing subjects directly in the center, which can make an image appear static.
- Use the grid as a guide: Many photo editing software tools provide an overlay grid to help you apply the rule of thirds effectively during editing. This grid can be a valuable aid in adjusting the composition.
By mastering cropping, straightening, and the rule of thirds, you can significantly enhance the overall composition of your images, making them more visually engaging and balanced.
3. Retouching and Refining

Once you’ve mastered the basics of photo editing and perfected your composition, it’s time to delve into the world of retouching and refining. This will explore advanced techniques to elevate your images to the next level.
Remove Blemishes
For portrait photography and even some landscape shots, removing imperfections and unwanted elements is a crucial step in retouching. Here’s how to do it:
- Healing Brush or Clone Stamp: Most photo editing software includes tools like the healing brush or clone stamp. These tools allow you to sample a nearby area and “paint” over blemishes, wrinkles, or other unwanted elements, effectively making them disappear.
- Spot Healing: Some software offers a spot healing tool that automatically detects and removes small imperfections with a single click. It’s a quick way to clean up minor issues.
Remember, the goal here is not to completely alter reality but to enhance the subject’s natural beauty or remove distracting elements that don’t contribute to the image’s story.
Dodge and Burn
Dodge and burn are advanced techniques that add depth, dimension, and emphasis to specific areas of your image.
- Dodge: The dodge tool lightens areas of your photo. It’s useful for brightening highlights or drawing attention to specific details. For example, you can use dodge to make eyes sparkle or enhance the highlights on a landscape.
- Burn: The burn tool darkens areas of your photo. It’s ideal for adding shadows and creating contrast. You can use burn to make certain parts of the image appear more dramatic or to emphasize texture.
Dodge and burn are subtle but powerful tools in photo editing. They allow you to fine-tune the lighting and mood of your images. By mastering these retouching and refining techniques, you can take your photo editing skills to the next level. Now, let’s dive into the world of filters and effects, enabling you to experiment and infuse your photos with creative flair.
4. Filters and Effects
In the world of photo editing, filters and effects can add a creative dimension to your images, transforming them into unique and visually striking pieces of art. This section explores how to use filters and effects to infuse your photos with creative flair.

Applying Filters
Filters are pre-designed settings or adjustments that can dramatically change the look and feel of your photos. Here are some popular filters and how to use them:
- Vintage Filters: Vintage filters can give your photos a nostalgic, aged appearance. They often include adjustments to color tones, vignettes, and grain. Experiment with vintage filters to evoke a sense of history or nostalgia.
- Black and White Filters: Converting your photos to black and white can create a timeless and dramatic effect. Most photo editing software offers black and white presets, but you can also fine-tune the conversion by adjusting brightness, contrast, and individual color channels.
- Cinematic Effects: Cinematic filters mimic the color grading used in movies and can lend a cinematic quality to your photos. They often emphasize certain colors while desaturating others, creating a moody atmosphere.
Adding Text and Graphics

For various purposes, such as social media, marketing materials, or personal projects, you might want to add text or graphics to your images. Here’s how:
- Text Overlay: Most photo editing software includes a text tool. You can choose fonts, sizes, colors, and positions to add text to your photos. This is ideal for captions, quotes, or branding.
- Logos and Graphics: To add logos or graphics, use the layering feature in your editing software. Import your graphics file and position it where you want it to appear in the image. You can adjust the opacity and blend modes for a seamless integration.
Remember, while filters and effects can be fun and creative, moderation is key. Overusing them can detract from the authenticity and impact of your photos. Always consider the message and mood you want to convey. Now, we’ll dive into the technicalities of saving and exporting your edited photos. These considerations are essential to ensure your images look their best across different platforms.
5. Saving and Exporting
Once you’ve put in the time and effort to edit your photos to perfection, it’s crucial to know how to save and export them correctly. We will explore the technical aspects of saving and exporting your edited images to ensure they appear at their best across various platforms and media.
File Formats
The choice of file format for your saved images is essential, as it can impact image quality and compatibility. Here are some common file formats and their best uses:
- JPEG (Joint Photographic Experts Group): JPEG is a widely supported format ideal for web sharing and social media. It offers good compression, making file sizes smaller, but at the cost of some image quality. It’s perfect for photos meant to be viewed on screens.
- TIFF (Tagged Image File Format): TIFF is a lossless format that retains the highest quality. It’s suitable for images that will undergo further editing or will be printed. Keep in mind that TIFF files are larger and may not be as widely supported online.
- RAW: RAW files are the uncompressed, unprocessed data captured by your camera’s sensor. They offer the most flexibility for editing but require specialized software to open and edit. RAW is excellent for professional photographers and those who want the utmost control over their images.
Compression and Resolution
When saving JPEG files, you’ll often encounter options for compression and resolution:
- Compression: JPEG compression settings determine the trade-off between file size and image quality. Higher compression reduces file size but may result in some loss of detail. Lower compression preserves more detail but results in larger file sizes.
- Resolution: Resolution refers to the number of pixels in an image. Higher-resolution images have more detail but also larger file sizes. For web use, a resolution of 72 dpi (dots per inch) is standard. For print, use 300 dpi or higher.
Color Profiles
Another crucial consideration is color profiles. Different media, such as screens and printers, interpret colors differently. Be sure to choose the appropriate color profile when saving your image:
- sRGB: This is the standard color profile for web use and most screens. It provides consistent color representation across different devices.
- Adobe RGB: Adobe RGB has a wider color gamut and is preferred for images intended for print. It captures a broader range of colors but may not display accurately on all screens.
Naming and Organization
Properly naming and organizing your saved images is essential for staying organized and finding your work later. Use descriptive file names and create a logical folder structure to keep your edited photos organized and easy to locate.
With your images saved and exported correctly, you’re ready to share your creations with the world. Now, we’ll discuss the importance of practice and patience in honing your photo editing skills, bringing everything together in your journey to mastering the art of enhancing your images.
6. Practice and Patience
Congratulations on your journey to mastering the art of enhancing your images through photo editing! As you’ve learned, photo editing is a skill that combines technical knowledge with creativity. To truly excel in this craft, it’s essential to embrace two key principles: practice and patience.
Experiment and Learn
1. Experimentation: Don’t be afraid to experiment with different techniques, tools, and styles. Trying new things is how you discover your unique editing style and develop your skills. Edit the same photo in various ways to see how different adjustments affect the final result.
2. Tutorials and Courses: There’s a wealth of online tutorials, courses, and resources available. Many websites and platforms offer free and paid courses on photo editing. These can help you learn new tricks and techniques from experts in the field.
3. Feedback and Critique: Share your work with others and seek feedback. Join photography and editing communities, both online and offline, to get constructive critique. Other photographers and editors can provide valuable insights and suggestions for improvement.
Be Patient
1. Learning Curve: Photo editing has a learning curve, and it’s normal to encounter challenges along the way. Be patient with yourself, and understand that improvement takes time and practice.
2. Progress Tracking: Keep track of your progress by saving different versions of your edited images. This allows you to see how far you’ve come and helps you identify areas where you can continue to improve.
3. Inspiration: Seek inspiration from other photographers and artists. Studying their work can fuel your creativity and motivate you to keep refining your editing skills.
4. Consistency: Consistency is key to improvement. Try to edit photos regularly, even if it’s just a few minutes a day. Over time, these small efforts will add up.
Remember that photo editing is both an art and a technical skill. Your style will evolve as you gain experience, and your editing abilities will sharpen. Be open to learning and adapting as you grow as a photo editor.
Conclusion
Photo editing is a skill that can transform your ordinary images into extraordinary works of art. Whether you’re a professional photographer or a hobbyist, mastering the art of enhancing your images is a valuable skill. By understanding the basics, practicing regularly, and experimenting with different techniques, you’ll be well on your way to becoming a proficient photo editor. So, grab your favorite photos, fire up your editing software, and start creating stunning visuals that tell your unique story.