In an era characterized by the digitization of nearly every aspect of our lives, the need for efficient and secure methods of signing digital documents has become increasingly important. Digital signatures have emerged as a vital tool for individuals and businesses alike. In this comprehensive guide, we will explore three effective methods on how to create a digital signature. By mastering these methods, you’ll be well-equipped to navigate the digital signature landscape confidently. We will delve into three distinct methods that cater to various preferences and requirements:
- Adobe Acrobat
- MS Word
- BunnyDoc
Method 1: Creating a Digital Signature with Adobe Acrobat
Adobe Acrobat, renowned for its prowess in handling PDF documents, offers a seamless online method for creating digital signatures, whether you prefer to do it online or through the desktop application. Here, we’ll walk you through the steps to create your digital signature using Adobe Acrobat’s online platform, which closely mirrors the process in the desktop application.
1. Access Adobe Sign: Begin by accessing Adobe Acrobat’s online platform. If you do not have an Adobe account, you can create one easily.
2. Upload Your Document: Once logged in, upload the document that requires your digital signature. Adobe Acrobat’s online interface allows for effortless document upload.

3. Add Signature Field: Locate the “Fill & Sign” tool within Adobe Acrobat’s online platform. Within this tool, you’ll find the “Signature” field. Simply drag and drop this field onto the document at the point where your signature is needed.

4. Create Your Signature: Adobe Acrobat offers various options for creating your digital signature. You can type your name, draw your signature using your mouse or touchscreen, or upload an image of your handwritten signature. Select the option that best suits your needs.
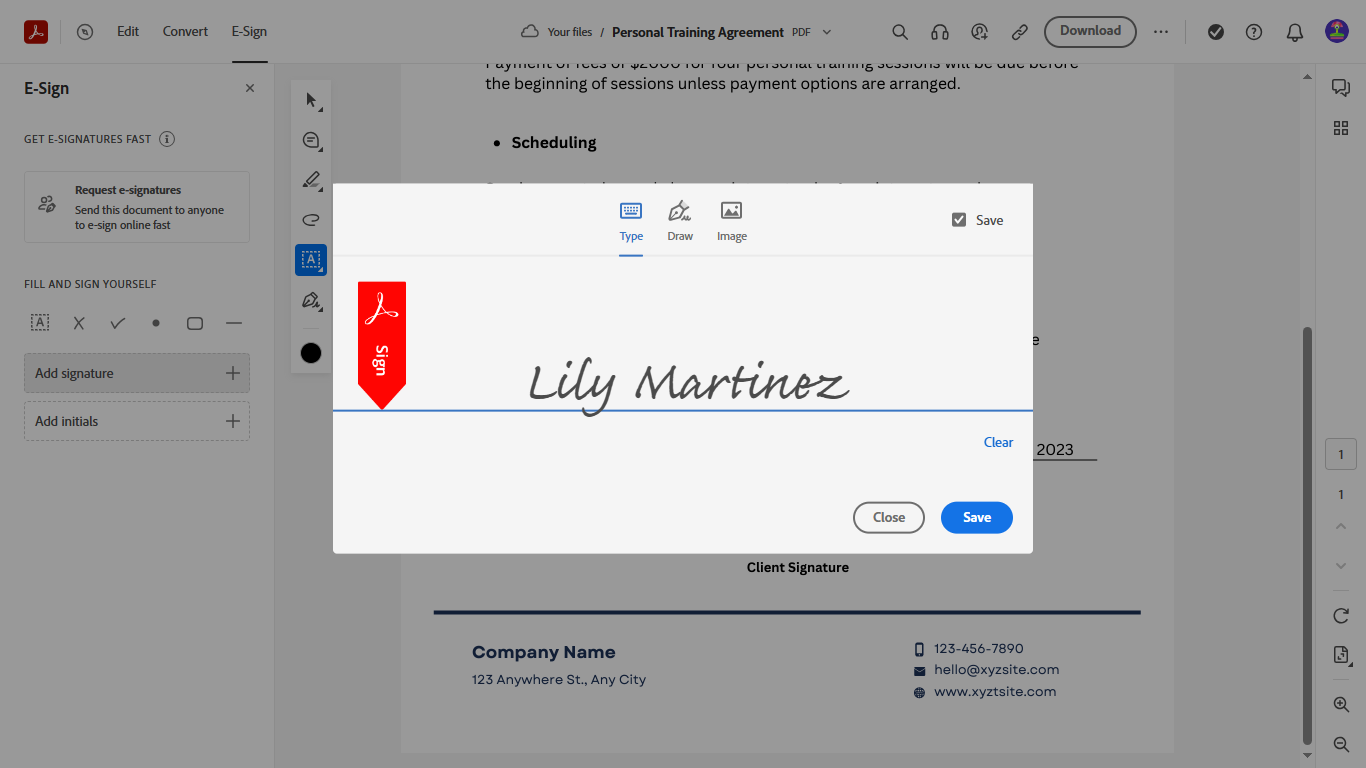
5. Place and Resize: After creating your signature, you can click and drag the signature field to precisely position it within the document. You can also resize the field to ensure your signature fits seamlessly.

6. Download the file: Once you’re satisfied with the placement and appearance of your digital signature, click “Download” to download the signed document.
Adobe Acrobat’s online method for creating digital signatures is both secure and widely accepted in professional and legal contexts. It offers a straightforward and efficient way to add your signature to digital documents without the need for specialized software or complex processes.
Method 2: Creating a Digital Signature with MS Word
Microsoft Word, a ubiquitous word processing software, offers a user-friendly method for creating digital signatures. Follow these steps to generate your digital signature using MS Word:
1. Open Your Document: Launch Microsoft Word and open the document that requires your digital signature. Ensure that you are using a recent version of MS Word, as older versions may lack this feature.
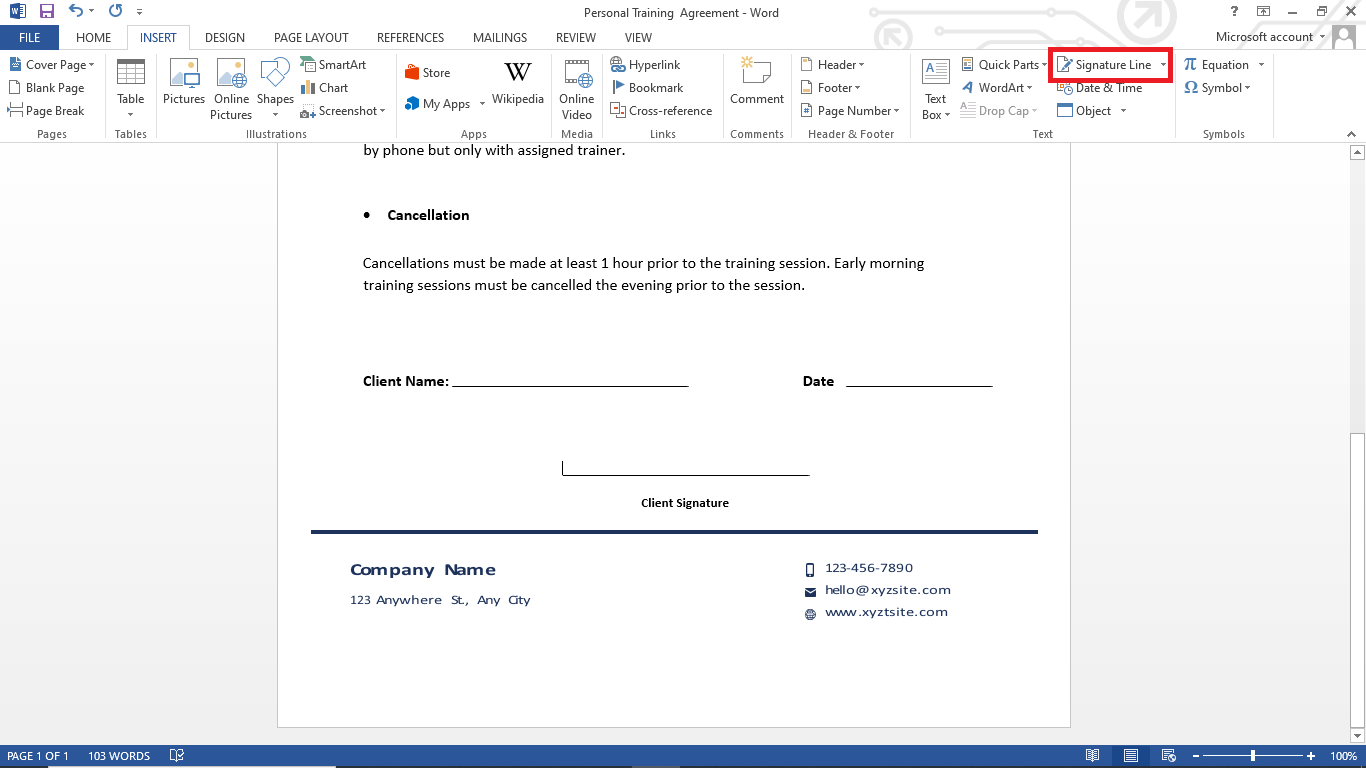
2. Insert Signature Line: Navigate to the area in the document where you want to insert your digital signature. Go to the “Insert” tab, and within the “Text” group, select “Signature Line.”
3. Configure Signature Details: A dialog box will appear, prompting you to set up signature details such as your name, title, and any additional instructions you deem necessary. Fill in these required fields.

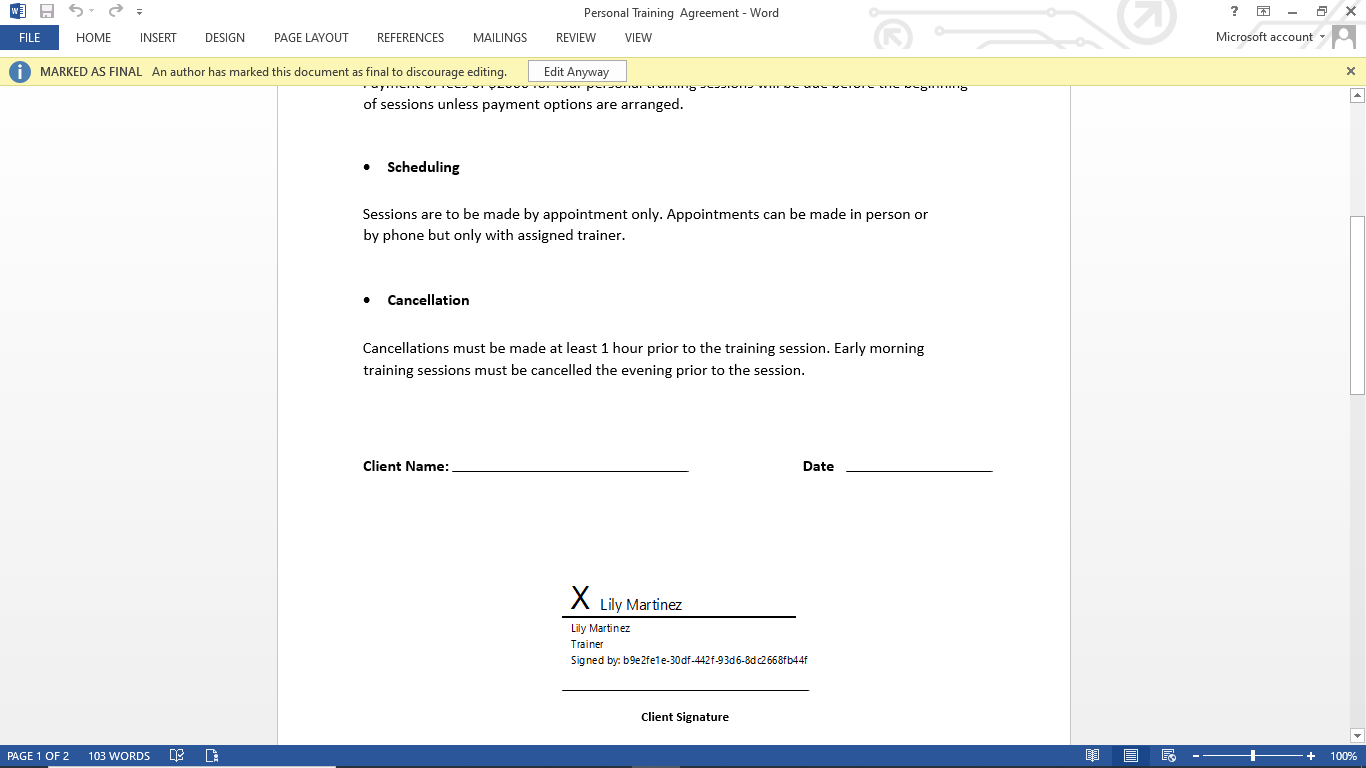
4. Add Signature: After configuring the signature details, click “OK.” MS Word will then insert a signature line into the document, which will serve as the placeholder for your digital signature.

5. Sign the Document: Right-click on the signature line you’ve just inserted and choose “Sign.” At this point, you have the option to either add a digital signature using an existing certificate or create a new one.


6. Save the Document: After adding your digital signature, save the document. MS Word will automatically embed your digital signature within the file.
Microsoft Word’s built-in digital signature feature provides a straightforward way to sign documents without the need for external software or online platforms. It offers convenience and familiarity for those already accustomed to working with MS Word, making it a reliable choice for creating digital signatures for your documents.
Method 3: Creating a Digital Signature with BunnyDoc (An eSignature Solution)
BunnyDoc, an advanced eSignature solution, goes beyond traditional digital signatures. It offers a comprehensive platform for creating digital signatures and securely signing documents. Here’s how to create your digital signature using BunnyDoc:
1. Access BunnyDoc: Start by signing in to your BunnyDoc account or create a new one if you don’t have an account yet. Registration is simple and free.
2. Create an Envelope After logging in, click the “Create” button under the envelope.

3. Upload Your file: Click the “Upload File” button. Select the document you want to sign from your device or cloud storage providers, and BunnyDoc will swiftly upload it to its secure platform.

4. Choose Signatory Role: Select “I’m the only signer” if you intend to sign the document individually and prefer not to forward it to another signatory. Then, click ‘Next’.
5. Drag & Drop Signature Field: Within the BunnyDoc document editor, locate the “Signature” option and drag and drop it where you want to sign.
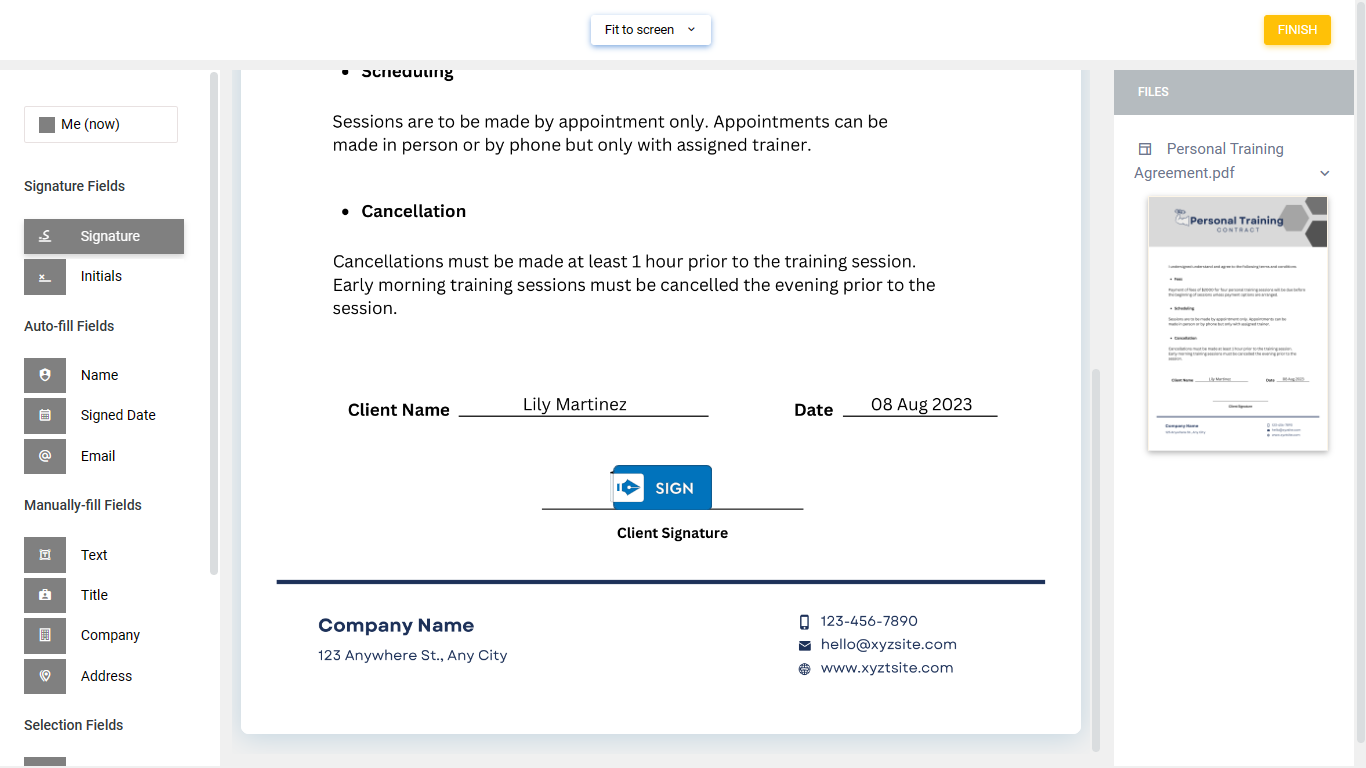
6. Insert Your Signature: Here, you can create your digital signature using one of several methods:
- Draw Your Signature: Use your mouse, touchscreen, or stylus to draw your signature directly onto the document.
- Type Your Name: If you prefer a typed signature, BunnyDoc allows you to type your name and select from various font styles to match your signature’s appearance.
- Upload an Image: Alternatively, you can upload an image of your handwritten signature to be added to the document.

7. Resize and Finalize: Adjust the size and orientation of your signature to ensure it fits perfectly within the document. Once satisfied with the placement, click “Finish” to embed your digital signature. The document will save automatically.

8. Download the file: You can now securely download the signed document for your records. To do it, Click the “Options” button and select the “Download” button from the drop-down menu.

Note: You can create and download your digital signature for free using BunnyDoc’s Signature Generator and insert it wherever needed in the future.

BunnyDoc is a versatile solution that not only enables you to create digital signatures but also offers comprehensive eSignature capabilities, including secure and efficient document signing. With an intuitive interface, multiple signature creation options, and an integrated audit trail feature, it is an excellent choice for individuals and businesses seeking an all-in-one eSignature and document management solution. Streamline your document signing processes with BunnyDoc while ensuring the highest standards of security and compliance.